
Well, now people are raving about customized products for gifts as well as personal uses. Photo printed coffee mugs are very common and not so innovative these days. So, here I am going to share a totally different DIY mug which you can customize everyday as per your mood and also can gift it to your beloved ones too !!
So, let’s check how I would prepare my chalkboard mugs. Things you will need-
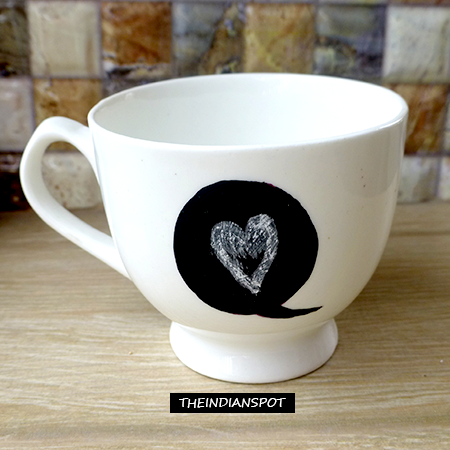
- Mug- I have used a white mug here as I love this black and white combo. But if you love colored mugs you can use them. But it’s better to use light colored mugs to make it more attractive.
- Chalkboard paint- I have used black. But green is also available. If you really don’t find it, you can use acrylic paint mixed with some glue. Chalkboard paints, once get dried, will last long and they are also dishwasher safe. So they will not start to chip easily. But acrylic paints wouldn’t last that long.
- Paint brushes- Any brush of your choice. I have used one of my existing paint brush.
- Scissors- Just to cut the cello tape
- Cello tape or painters tape
- Marker pens
- Chalks for decorating
- Some old newspapers to protect your floor/table from mess

Procedure-
- First clean the mug properly with good dishwasher and then allow it to dry thoroughly. Then you can clean it with rubbing alcohol as it will help the paint to adhere well to the surface of mug.
- Now it is the time to create your board. I mean the shape of the tiny board you are going to create. I prefer rectangle as it reminds me that old school days. Just apply tape in four sides maintaining your desired proportion of the rectangle. Draw the rectangle along the sides of the tapes with a marker.
In case of round shape, I didn’t use tapes and directly drew the round with the marker. If you can’t draw round, you can a round paper to draw the outline or better avoid!
- After drawing the outline, peel off the tape. If you don’t remove it, the paint would bled behind the tape and you would end up making a mess.
- Well, now it’s the time to paint. Paint the outlined area with your paint brush. Apply thin layers of the paint several time once the previous coat gets a little dry (when paint doesn’t come out when you touch on it softly)!
- Keep the mug for minimum 24 hours to dry. After that you have to bake it. Now set the temperature of your microwave at 300F. The easy process of baking is just allow your oven to pore-heat. It will make the required temperature for baking. After pre-heat, place the mug inside the oven and set the timer for 30 minutes! Then allow it to cool after removing from the oven and then decorate the chalkboard with chalks with your favourite quotes or doodles.
Every morning you can serve tea to your loved ones with writing some message on the board or even you can gift it to family members or friends. This is quite innovative and different from picture printed mugs!