I love nail arts. After all who doesn’t? They add spark to our everyday otherwise-plain nails; but only when it has a salon-like finish. Here is a tutorial about geometric nail art which can easily be done using a cello tape. Usually girls do such easy designs directly with the nail polish brush but it can sometimes look tacky especially when done by inexperienced hands. Read on to know how to do it:

Things I have used:
- Matte nail polish (self-made using eye shadow)
- Oriflame very me golden nail polish
- Cello tape
- Scissor
Method:
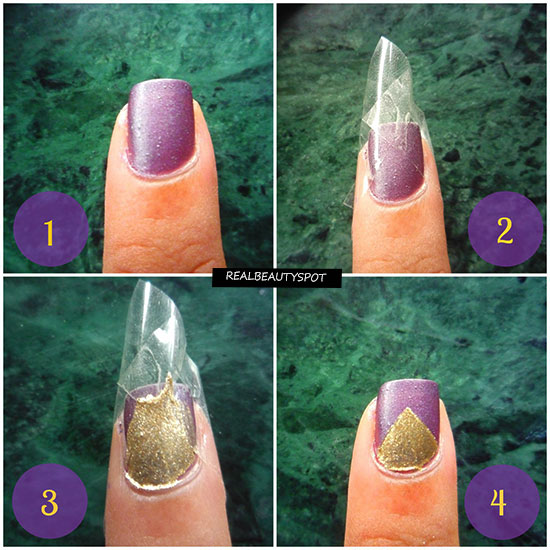
- Apply a nail polish as the base. (I have used purple matte nail polish)
- Let it dry completely before proceeding.
- Cut 1-2 inch cello tape and stick it on a dry surface and remove. Do this 2-3 times so that the cello tape loses its sticky nature. This is to prevent the cello tape from peeling your base nail polish.
- Stick the cello tape in such a way that it makes a triangle shape. You can make any shapes you want.
- Paint golden nail polish over it and peel off the cello tape.
- Tada! Amazing geometric nail art ready. Repeat this for rest of the nails.
- You can apply a top coat if the base nail polish isn’t matte.